Thursday, January 23, 2014

Mermaid Two

On December 9th, 2013, granddaughter Amira turned two.  I started her birthday painting a month before her birthday but didn't finish until one month after it. Contributing factors to the failure of the first attempt were not fully planning the layout (in a preliminary drawing) the mermaid was too small on the page, had serious anatomical issues and I have no idea why I opted to use so much yellow in an underwater scene?


MERMAID TWO   acrylic mixed media   20" x 16"


After ruminating long and hard, I still found myself unable to figure out what to do to rectify my mistakes. Time ran into Christmas preparations, plus I took time out to construct the journal (of my last post). I let it slide over the holidays but was adamant that I would deal with the painting immediately afterward. It had to be competed and in the regular post before my surgery date, January 17th. Mermaid Two arrived in Maryland while I was still in hospital, the day after my hip replacement.

Adam made a video of Laura helping the adorable Amira open her painting which you can view here. I love that Amira thinks the small mermaid is herself and the big one is Mummy!  
 

Pencil drawing 20" x 16"


After finally concluding there was no hope of salvaging the first mermaid I gessoed over her, multiple times. It was a relief to have made this decision; to proceed with a totally new concept!


Removed from the painted background, contact paper pieces served as patterns for the tails, etc.


Contact paper, Mac-Tac as we called it in the olden days, is a shelf liner (clear is best, with a pattern for visibility) available at any hardware store, was used as a mask to preserve the white areas of the mermaids. With these cut out pieces of contact paper in position I flooded the panel with water. Then, I dropped, splattered and manipulated thalo blue with small amounts of cerulean blue acrylic paint into the water, to create the patterns of underwater. 


When dry, I thought it was all just too blue so I washed thalo green over it further developing the mottled effects and textures. The sand is real, added by shaking it through a strainer onto wet gel gloss medium.  


Once I began painting the featured mermaid I realised that the rock upon which her shell sits was too short, indicating that adding the sand, when I did, was premature! I was able to scrape off the desired amount of sand and repair the area with more painting.

From purchased, hand made, reptile paper which was a textured, solid, royal blue I cut the tails (and the bras). It tinted easily and nicely with the thalo colours, a little dioxazine purple and Daniel Smith's duochrome mauve. Interesting how the paper curled when I made it wet - thankfully curling in a convex fashion. To me, this enhanced the look.   


The open shell may not be an oyster but it begged for a pearl, so I painted one in it!


The seahorse, black and turquoise coral were stamped on with commercial, rubber stamps. The dolphins are hand painted. The two dimensional shells are cut-out photocopied photos tinted with the blue and green thalo colours. Their shadows are painted onto the sand. I added more sand plus collected and purchased real shells. Using Sculpey, I built the starfish first by making a mould of one I bought in Hawaii (which was too orange for this painting). Using the mould I made a white starfish which I coloured the shades I needed it to be.

I have a feeling you're going to want to see what MERMAID ONE looked like.

Well, I'm not too proud to show you ... 


She's "Way Below the Ocean" ... never to be seen again!
  

Wednesday, January 1, 2014

Mixed Media Journal

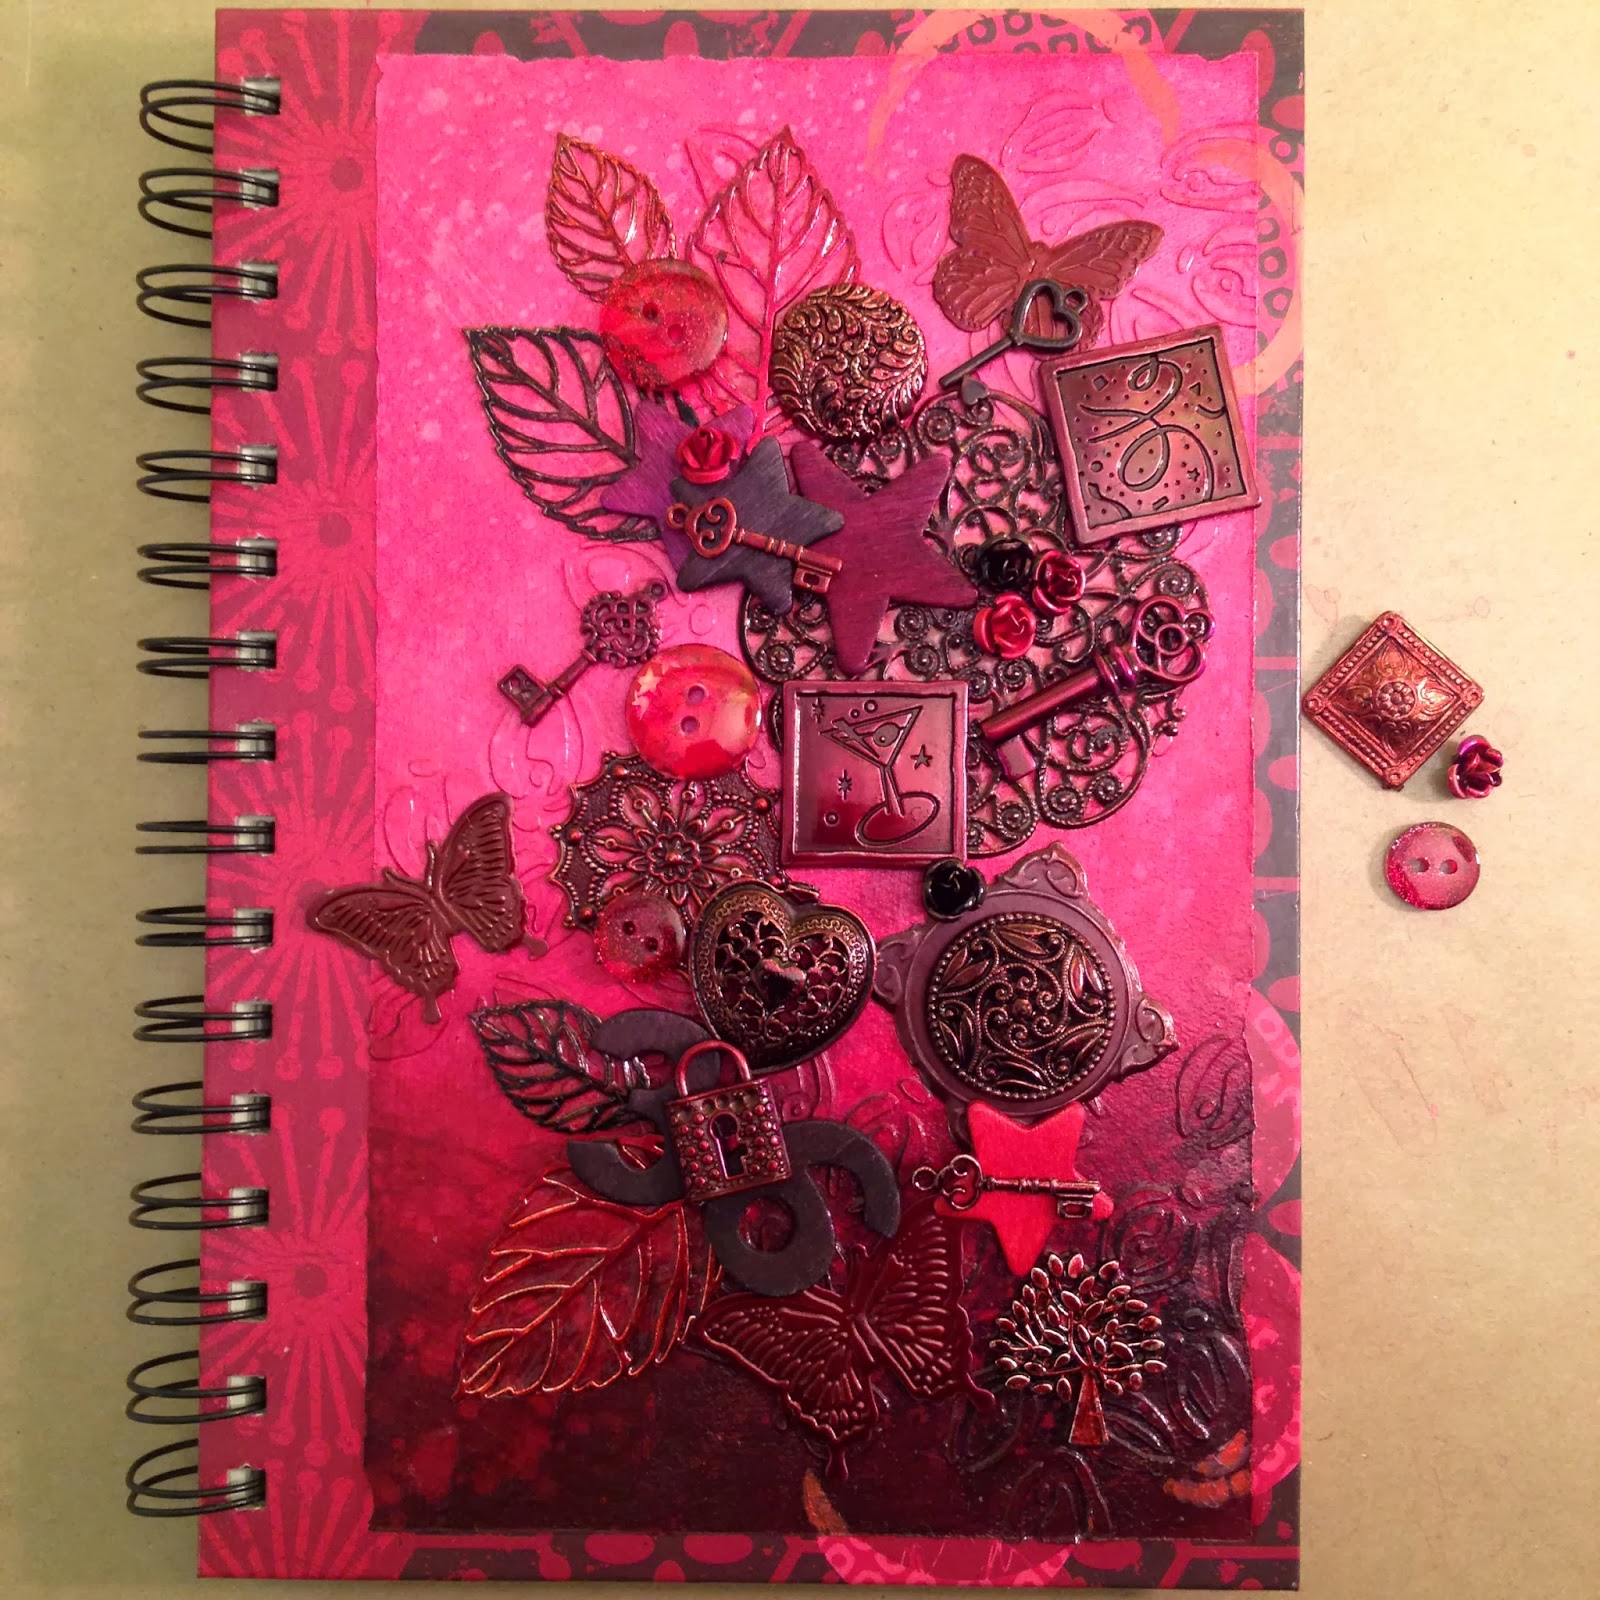
Recently our daughter, Laura, achieved her yoga teacher training certificate. Knowing she likes to keep notes on her yogic journey I purchased a ready-made, lined journal (because I couldn't find any craft covered journals) to alter for her birthday ...


Altered cover of the journal, mixed media, 9" x 6" 

Now that it has been gifted I can describe the trials and joys of creating this journal! Not wanting to change the back of it, I opted to go with its colour scheme. On the front, I masked off a border and covered the centre area with white gesso ... 


Start number one

On the gessoed area I created texture using a cell stencil. Once dry, I painted it to match the colours of the back.


The foreground shows the embellishments I coloured with assorted alcohol inks  

When I peeled away the frog tape (masking the border) the textured panel lifted too! In pieces! Had it come off intact, in one large piece, I'd have been able to secure it back down - once the original surface had been sanded that is. I hadn't thought to sand first and without sanding there is no tooth for adhesion.

 
A sad looking mess!


After I had coloured it, I felt the cell stencil pattern was too busy, too dense. Having to begin again gave me the opportunity to change stencils.


This time I used the petite pods stencil.

Second background adhered and finished!

Toying with the placement of the embellishments

The embellishments were a wild array of materials in different colours, none of which (except some of the tiny roses) were right for the journal. When it comes to colouring anything - metal, plastic, wood - alcohol inks work magically! All these trinkets could not be adhered at once. It took a lot of heavy gel gloss medium, slowly building multiple layers (with plenty of drying time between them) to secure them all down.

The idea for Laura's journal was inspired by this one ...


Together Laura and I saw this beauty at The Queens Ink near to where she lives in Maryland


     HAPPY BIRTHDAY LAURA!


On News Years Day 1978, at 11:17am, Laura Anne Marshall was born


And now our baby has a baby of her own ...


Laura and Amira, who turned two, December 9th, 2013


Tuesday, December 31, 2013

Gingerbread Art


We went all out creating an entire village this year! Between seven of us we built five and a half gingerbread houses!

The half being the outhouse along side of the saloon!

Our designer, Denise, came up with the concepts and drew paper patterns for all the houses. I used a recycled pattern (from 2010) made it even smaller and constructed it in reverse. There was a hiccup with the baking. I had the oven temperature too low. No amount of re-baking would cook the dough properly. Good thing we had ample because we had to toss the pieces for two houses and start over again. 


Christmas Eve we begin

A little one has to do something while waiting for her gingerbread house!

Boxing Day and at last construction/decorating begins


Originally we had planned to have all the components baked and assembled on Christmas Eve day. However, with the baking issues, it was the afternoon of the 25th before we finally had all the pieces cut and cooked - which dangerously cut into turkey oven time! 


John and Alison at work on their haunted house while Larry, holding his outhouse walls upright, looks on

Both John and Alison are professional chefs.  Their arrival on Boxing Day, when we had only two of the houses upright, meant they had the pleasure of erecting the haunted house they had requested before spinning their creative magic decorating it!


The intense industry of seven bodies had a significant effect on the physical temperature in our little breakfast room!

Everyone was so focused on their project it's a wonder we have any construction photos at all. With so many helping hands the decorating was complete in just a few of hours and then we all sat back to admire our handy work!


Alison photographing the masterpieces. She and John saw that the houses were well tweeted!

After moving the finished houses to the display area Denise was found adding more icicles!

Avery wanted hers to be a traditional house

John and Alison's haunted house. Notice the noose, tomb stones and zombie gingerbread man rising from the grave!

Denise's saloon and Larry's larger-than-life outhouse with embarrassed snowman!

Decidedly the most creative effort, Bill used (among other embellishments) molten licorice on his burnt down house!

My wonky house

The best part of these intense construction sessions is the unity of working collaboratively. I have to say that by the time we finally got to the decorating stage it was tremendous fun.  Will we be able to go back to making one, single house next year?


Monday, December 23, 2013

Christmas

In Alberta, winter came early (and is sticking around) setting us up for a white Christmas! After the December 2nd blizzard we were left with deep, crusted, cement-like drifts ...   

The snowblower can't go up the steps!

While in the past I have come up with some pretty far fetched colour combinations, this year the colour scheme is very traditional. For me it's all about ascetically pleasing arrangements and design.  


Loving the frog!
Atop the china cabinet
The dining room table does not escape my attention

My relatively new hobby of hand making cards becomes accelerated at Christmastime. The fun begins with collecting pretty papers, ribbons, embellishments and all the toys required to create them with!


Some of the collection

Challenging good fun (and early on in the game, when I thought I had all the time in the world) I figured out how to mark, fold, cut, and tuck a paper "braid", seen in two of the cards below.  


Cards for Amira and her parents
Avery's card

One evening a week Lynda and I join Debbi in her exquisite, sunroom/crafting space. And yes, there is often wine involved! Toward the end of November we had an intense Sunday. An all day, twelve-hour, card making marathon! By mid December we amped up our sessions to two evenings a week. Here are the cards I made (at home) for my card-making pals ...


Thirty of my cards were one of a kind, original designs. Enamoured with the look of a card Lynda had made (fashioned after one she found on Pinterest) I went into mini production cutting two inch squares to emboss. Varied them a bit with three different colour combinations ...


This was perhaps my most creative endeavour

And this was likely my most traditional

As you appreciate everything you have in life, remember that your time and love are the best gifts you can give. 

Whoever you are with and wherever you are, Merry Christmas!

Monday, December 2, 2013

Fairy Heaven


FAIRY HEAVEN   unframed 24" x 12" mixed media on a cradled wooden panel with 2" deep sides

On October 16th, Avery celebrated her 5th birthday, in Calgary, while we were on the Blue Ridge Parkway in Virginia, USA. Late in September, before departing on our month long trip I had only the background painted. The name Avery means "elf ruler". I envisioned that she should preside over her subjects from atop a tall mushroom. The pose was inspired by a winged figurine I saw in a Stony Plain shop last summer.


The background is a wash of acrylic colours which, while still damp, I sprayed with clear water. Using a large, dry brush, I gently wiped up the water drops to create the mottled effect. The dangling fern leaves are stencilled on. 


This first incarnation of Avery's face was hopelessly unlike her. Frustrated, I set aside painting her, in favour of proceeding to develop the rest of the image. The butterfly, dragon flies and pom pom flowers are stamped on with commercial rubber stamps. 

I'm a huge fan of Cicely Mary Baker's exquisite flower fairies, so, when (years ago) I found a collection of cut-out decoupage pieces, I bought them. From these I selected fairies to match my colour scheme who would look up at Avery (with the exception of the one on the bottom left who dances to her own drum). 

Arranging dried leaves and fairies helped me see what more to paint on the background


Avery's face continued to frustrate me. Thinking it would help, I opted to paint over it using oils (the medium I'm most comfortable with). Even then, I painted and then wiped her face off, twice. After the fourth attempt, I had to concede (once again) that I am not a portrait painter and this was a good as it was going to get! ...  


Reference photo I used (taken July, 2013)

Avery's Mom observed that her expression, in the photo above, is not a common one. However, not wishing to offend or tell me how to paint, Denise held back suggesting that I use a different photograph as reference. This may have helped, we'll never know! Certainly the sweet, mischievous look on her face eluded me.


Finally, on November 28th, FAIRT HEAVEN is delivered to Avery

When I view the painting as a complete image ... and from a distance ... I am pleased with its overall sensation.  Thanks to everyone who supported and listened to me as I obsessed and agonized over it. Also thanks to Judy Dahl for her home grown mushroom images, to Win Dinn for those stunning leaves along the bottom and to Karen Linderman for the title.